
Aktion Gesunder Rücken e.V.
Help with back pain

Kontaktieren Sie uns -
wir helfen Ihnen gern!
Contact us -
we are happy to help you!
Contáctenos -
¡Estamos felices de poder ayudarte!
Contactez-nous -
nous sommes heureux de vous aider!


Vielen Dank.
Sie haben sich erfolgreich von unserem Newsletter abgemeldet.
We will show you simple and effective exercises to strengthen and relieve your back. With clear instructions and helpful tips, the exercises can be easily integrated into everyday life. This can prevent back pain and improve mobility in the long term.
Airex Balance-pad/beam

TOGU Brazil

TOGU Powerball

TOGU Pendel Ball

TOGU Redondo Ball

TOGU Dynair Ball cushion

TOGU Dynair Ball cushion XXL

TOGU Jumper Balance Ball

TOGU Dynair Pro

TOGU Senso Vein Trainer

TOGU Aero-Step

TOGU Balanza Ballstep

TOGU fasciae rollers

Vibration bars

Training tube

Exercise 1

Sit upright. Grasp the wrist of the other hand with one hand and pull the arm over the head to the opposite side. Hold the tension for approx. 10 seconds and repeat the exercise with the other arm.
Exercise 2

Stretch one arm vertically upwards and bend your elbow as far as possible behind your head. Then pull the elbow towards the opposite shoulder with the other hand. Hold the tension for approx. 10 seconds and then switch arms.
Exercise 3

Stretch your right arm forwards and fold your hand downwards. Then grasp the fingers and palm of your right hand with your left hand and pull them towards your body. Hold the tension for approx. 10 seconds and repeat the exercise with the left arm.
Exercise 4

Stretch your cervical spine and tilt your head towards your right shoulder. Now slowly swing your chin in a semi-circle over your chest to the left side. Repeat the movement approx. 10 times.
Exercise 1

Sit upright on a chair, tilt your pelvis slightly forwards and lift your sternum. Now grasp the gymnastics pole with both hands and stretch your arms vertically above your head. Now tilt your upper body forwards and turn it alternately from right to left with small, relatively quick movements. Perform the movement for approx. 30 seconds and make sure that your back remains straight.
Exercise 2

Assume the upright sitting position again and grasp the bar at one end at a time. Guide it vertically behind your back and try to bring your hands together on the bar as far as possible. Hold the position for approx. 10 seconds and then switch arms.
Exercise 3

Grasp the pole with both hands and raise your arms with your elbows bent. Now slowly move your arms and the pole backwards at different heights. Perform the exercise for one minute.
Exercise 4

Sit upright and stretch the bar horizontally forwards. Now try to push the bar slightly apart and then back together again with your elbows slightly bent. Repeat the movements for one minute.
Exercise 1

Sit up straight and make sure you keep your back straight. Grasp the Theraband with both hands at a distance of around 30 cm, palms facing upwards. Let your shoulders hang loosely and pull the band apart with both hands. Then slowly release the tension. Repeat the exercise approx. 10 times.
Exercise 2

Place your right foot on the Theraband and take the other end in your left hand. Then move your left arm diagonally upwards to the left against the resistance of the band. Release the tension and lower your arm until you still feel tension in your shoulder. Repeat the exercise approx. 10 times and then switch arms.
Exercise 3

Wrap the ends of the band around your palms and stretch your arms upwards at your sides. Slowly pull the strap apart with both hands. Then release the tension and repeat the exercise approx. 10 times.
Exercise 4

Sit on the Theraband and hold the ends of the band with both hands. Now move both arms diagonally alternately forwards and backwards approx. 10 times.
→ Information about back-friendly hand training equipment can be found here www.agr-ev.de/en/handtrainers
→ Download exercise flyer "Barbells"
Exercise 1

Sit upright. Move both arms sideways along your body (diagonally) alternately forwards and backwards slowly approx. 10 times. Lift your feet alternately up and down.
Exercise 2
Stretch both arms forwards and upwards. Then bend your elbows again and move the barbells towards your shoulders.
Exercise 3

Stand with your knees slightly bent. In a standing position, raise both arms sideways with your elbows bent (U-shape). Now rotate your arms alternately upwards and downwards at the shoulder joints.
→You can find information about back-friendly hand training devices here www.agr-ev.de/en/handtrainers
Exercise 1

Stand on one leg. One hand throws and catches a Brasil rhythmically, the other hand shakes the other Brasil in a double rhythm next to the ear. Change legs and hands after a few repetitions. The exercise may not work ;-) then train your coordination skills!
Exercise 2

Stand with your feet hip-width apart. Lower the buttocks backwards. Extend your arms forwards as an extension of your torso. Now perform mini moves (small chopping movements) with your arms. Keep your back straight! for 10 seconds, then take a short break and repeat the movement again
Exercise 3
Get into a quadruped position. Raise one arm to the side. Perform mini moves forwards and backwards with this arm for approx. 20 seconds. Then stretch the opposite leg backwards and pull it towards you again, rounding your back and stretching it again. Move the brazil towards the knee and outwards during the movement. After a few repetitions, repeat the whole sequence of movements again from the beginning. Start with the mini moves!
Exercise 4

Go into the supine position. Raise the pelvis. Now stretch your arms towards the ceiling. Lift your right and left leg alternately by tensing your torso. Keep the pool stable! After a few repetitions, keep one leg raised. Perform mini moves with the brasil for 20 seconds. Adjust the mini moves and raise and lower your legs again alternately. After a few repetitions, hold the other leg up and perform mini moves for 20 seconds.
→ Information about back-friendly exercise mats can be found here https://agr-ev.de/en/exercise-mats
Exercise 1

Lie in a prone position, place your forehead on the back of your left hand and stretch your right arm forwards as an extension of your body with your buttocks tensed. As you inhale, raise your right arm and left leg as well as your head with your eyes on the mat and your abdominal muscles tensed. Push yourself away from the floor with your left arm and right thigh, with your thumb pointing towards the ceiling. Repeat the exercise three to four times and then change sides.
Exercise 2

Sit upright (advanced students in the tailor's or lotus position, beginners on a chair/stool with your feet on the floor), place your hands on your knees, stretch your spine and breathe in deeply. As you exhale, place your left hand on your right knee and turn your upper body to the right. Place your right hand behind your pelvis. Stretch the spine as you inhale and increase the rotation on the next exhalation. Hold for a few breaths and then repeat with the other side.
Exercise 3
1. Start sitting on your heels, then place your chest on your thighs, your forehead on the mat and stretch your arms out in front of you.
2. As you inhale, stretch your upper spine, lift your chest and head and stretch your neck.
3. As you exhale, get into a quadruped position and hunch over.
4. As you inhale, lower your centre back until you have a hollow back and your chest expands.
5. For advanced users only: As you exhale, put your feet up and assume the position of the dog looking down. Pay attention to stretching your back and keep your legs bent if it feels better. Hold the position for a few breaths.
6. Then bring your knees to the floor and stand on four feet. Now start the exercise from the beginning and repeat it 5 times.
→ Information about back-friendly exercise mats can be found here www.agr-ev.de/en/exercise-mats
Exercise 1

Lie on your side, support yourself with your left forearm and bend your left leg. Stretch your right arm over your head. Raise and stabilise the pelvis. Hold the tension until the muscles are tired. Then change sides.
Exercise 2

Get into a quadruped position. Extend your right arm and left leg diagonally. The gaze is directed at the floor. Perform the exercise approx. 10 times and then switch arms and legs.
Exercise 3

Lie relaxed on your back and clasp your knees with both hands. Carefully pull your knees towards your upper body. Hold the voltage for one minute.
Exercise 4

Kneel on the floor, bend your upper body forwards and support yourself with your forearms. Now push your left heel vertically towards the ceiling. The knee and ankle are bent at a 90° angle. Repeat the exercise approx. 2 times per leg until the muscles are tired.
→ Information about back-friendly exercise mats can be found here www.agr-ev.de/en/exercise-mats
Exercise 1

Starting position: Stand upright.
Exercise: With your upper body upright, push your pelvis backwards and slowly bend your knees to 90 degrees.
Variation: Clasp your hands behind your neck, practise close to a wall or bend your knees in a controlled manner. 8 - 15 repetitions
Exercise 2

Lie on your stomach on the mat with your arms and legs stretched out. Raise your arms, upper body and legs a little at the same time and hold the tension briefly. Then lower slowly. Repeat the exercise approx. 10 times.
Exercise 3

Support yourself on your forearms, stabilise your shoulders and hips by tensing your abdominal muscles and buttocks in parallel. Hold position. Variation: Raise your arm or leg straight from the floor. 8 -15 repetitions of three series per side
Exercise 4

Starting position: 4-foot stand. Place your hands on the floor, pull your shoulders away from your ears, keep your neck long and lift your sternum forwards and upwards. Raise your arm to the side and back at the same time. Thumb points to the ceiling or backwards, head and thoracic spine turn to face the hand, pelvis remains immobile. repeat 16 times then change sides.
→ Information about back-friendly exercise and pendulum balls can be found here www.agr-ev.de/en/exercise-balls
→ Download exercise flyer "Exercise ball" part 1
→ Download exercise flyer "Exercise ball" part 2
Exercise 1

Sit upright on the Powerball, raise your left knee and press against the raised knee with your right hand. Stretch your left arm towards the ceiling. Then change the leg. Repeat approx. 10 times.
Exercise 2

Lie on your stomach on the ball and support yourself with your hands and toes on the floor. Now slowly raise and stretch out your left arm and right leg. Hold tension briefly and then change arm and leg. Repeat the exercise approx. 15 times.
Exercise 3

Lie on your back and place your heels on the ball. Then slowly move your pelvis up and down, taking care not to arch your back. Repeat the exercise about 20 times.
Exercise 4

Kneel in front of the Powerball and place both arms on the ball. Carefully push your sternum towards the floor and turn your upper body from left to right. Perform the exercise approx. 10 times.
Exercise 1

Sit upright on the Powerball. The legs are stable and positioned hip-width apart. Raise your arms to shoulder height and bend them upwards. Now turn from your body's longitudinal axis backwards alternately to both sides. The shoulders remain lowered and the head turns with them. Each side approx. 10-12 times. 3 passes.
Exercise 2

Lie in the forearm support with your lower legs or feet resting on the exercise ball. The body forms a straight line. Hold the support position without falling into a hollow back. The torso remains firm, the ball may only move minimally.
Exercise 3

Lie on your stomach over the Powerball ABS. Your legs assume an open and stable position. Lie with your entire upper body over the ball. Her hands are fixed to the right and left of her head. Now come up with your back until your upper body is in line with your legs. Looking straight down. 12-15 repetitions. 3 passes.
Exercise 4

First sit on the ball and roll slowly and in a controlled manner into a supine position so that the ball is directly under your back and your head hangs loosely over it. Take your arms up at your sides and enjoy the complete stretching of your abdominal and chest muscles. The shoulders are relaxed so that the chest can open and the front muscles can expand. Approx. 30 seconds.
→ Information about back-friendly pendulum balls can be found here www.agr-ev.de/en/exercise-balls
→ Download exercise flyer "Pendel Ball"
Exercise 1

Lie on your back in a bridge position with your upper body on the pendulum ball. Her hands are fixed to the side of her head. Now push your body weight over the pendel ball towards your feet. Maintain body tension and do not sink down with your buttocks. Repeat the exercise approx. 15 times. 3 passes.
Exercise 2

Lie on your back on the pendel ball. Hold your hands at the side of your head and raise your upper body slightly. Remain in this position and alternately lift one leg off the floor. Each side approx. 15 repetitions. 3 passes.
Exercise 3

Stand with your hands shoulder-width apart on the mat and place your lower legs on the exercise ball. Your body forms a straight line from your shoulders to your feet. Hold this position by actively tensing your core muscles and keeping the ball as still as possible.
Exercise 4

Get into a kneeling position in front of the exercise ball and place your forearms on the ball. Keep your back as straight as possible and actively tense your abdominal and core muscles. Now slowly roll the ball forwards a little and back again without falling into a hollow back.
→ You can find information about back-friendly Redondo balls here www.agr-ev.de/en/exercise-balls
Exercise 1

Lie on your back on the mat and place your feet hip-width apart. Place the small ball between your knees. Tighten your abdominal and gluteal muscles and lift your pelvis upwards until your body forms a straight line. Squeeze the ball slightly to additionally activate the thigh muscles. Then lower the pool again in a controlled manner.
Exercise 2
Lie on your back on the mat and place the small ball under your pelvis. Place your arms relaxed next to your body. Now raise one leg at a time until both legs are at a right angle above your hips. Then slowly lower one leg again without falling into a hollow back and perform the movement in a controlled manner.
Exercise 3

Lie on your back on the mat and place the small ball under your pelvis. Put your feet up and place your arms relaxed above your head. Now slowly tilt your pelvis forwards and backwards so that your lumbar spine alternately rises and falls slightly. Carry out the movement calmly and in a controlled manner.
Exercise 4
Stand up straight and hold the Redondo ball with both hands over your head. Tense your core slightly and slowly lean to the side without turning your hips. Then return to the upright centre and repeat the movement to the other side. Perform the exercise in a calm and controlled manner.
→ Information about back-friendly balance cushions can be found here www.agr-ev.de/en/balance-pads
→ Download exercise flyer "Dynair ball cushion"
Exercise 1

Stand on four feet and place the ball cushion in the centre under one knee. Now lift the other leg backwards, stretched out. Keep your pelvis and back straight and pull your belly button firmly inwards. Now gently rock your outstretched leg towards the ceiling approx. 15 times. Repeat this exercise 3 times on each side.
Exercise 2

Sit up straight on the ball cushion. The centre of your body lies slightly behind the centre of the ball cushion. Now lift both feet off the floor and balance your body. Hold this position for approx. 10-15 seconds and repeat this exercise approx. 15 times.
Exercise 3

Sit in the centre of the ball cushion and place your feet in front of you at an angle. The back is straight, the abdominal muscles are activated. Now take an object between your hands at the height of your sternum and turn alternately from the centre of your body to the right and to the left. The shoulders are low, the head moves with them. Each side approx. 15 times. 3 passes.
Exercise 4

Stand on the balance cushion without shoes, with your hips and upper body upright and your arms hanging loosely beside your body. Now try to keep your balance and make small equalising movements if necessary. The foot and core muscles actively work together to compensate for the instability.
→ Information about back-friendly balance cushions can be found here www.agr-ev.de/en/balance-pads
→ Download exercise flyer "Dynair ball cushion XXL"
Exercise 1

Lie on your stomach on the balance cushion with your arms at your sides and your legs stretched out. Now raise your upper body and legs slightly at the same time, hold the tension in your back and lower yourself again in a controlled manner. The cushion provides additional instability and activates the deep muscles.
Exercise 2

Lie on the Dynair XXL with your upper body in a supine position. Her legs are bent and her hands lightly support her head. Now move your upper body slightly upwards and turn from here to the right, back to the centre and to the left in a controlled manner. Work approx. 15 times to each side. Breathe evenly. 3 passes.
Exercise 3

Lie on your side over the Dynair XXL. Your pelvic bones are positioned vertically on top of each other. Her head rests on the lower, outstretched arm. Now pull your upper body sideways upwards. Repeat this exercise about 15 times on each side. 3 passes in alternation.
Exercise 4

Sit in the centre of the Dynair XXL with your upper body upright and your legs in a relaxed cross-legged position. Now tilt your pelvis to the right and left in a controlled manner. Your lowest ribcage approaches the respective iliac crest. Each side approx. 15 times. 3 passes.
→Information about back-friendly balance cushions can be found here www.agr-ev.de/en/balance-pads
→ Download exercise flyer "Jumper"
Exercise 1

Lie on your back on the jumper. Activate all your core muscles and raise your arms and legs. The right leg is stretched out, the left leg is bent, at the same time the left arm is stretched out over the head and the right arm is positioned parallel to the body. Maintain centre body tension. Repeat this exercise approx. 15 times per side.
Exercise 2

Lie on your back and place your feet on the jumper with your legs straight. Now lift your buttocks. From this position, stretch one leg forwards in extension of the thigh. Make sure that your buttocks do not lose height. Repeat this exercise alternately about 10 times on each side. Lower the buttocks again and again in between.
Exercise 3

Turn the jumper round so that the black plate is facing upwards. Get into a supporting position and make sure your posture is straight. Now alternately bring one foot forwards to the side of the jumper and put it back again. Each side 10-15 times. 3 passes.
Exercise 4

Lie sideways over the jumper. Support yourself on your forearm and make sure that your elbow is positioned vertically under your shoulder. The pelvic bones stand vertically on top of each other. Now pull your legs straight up from your waist and lower them again. Repeat these exercises 10-15 times.
→Information about back-friendly balance cushions can be found here www.agr-ev.de/en/balance-pads
→ Download exercise flyer "Dynair Pro"
Exercise 1

Lie on your back and place your heels on the Dynair Pro with your legs straight. Now slowly raise your buttocks until your pelvis is in line with your knees. Hold this position and make sure that your buttocks do not lose height. Now slowly lower your buttocks again. Repeat this exercise about 15 times.
Exercise 2

Sit up straight on the Dynair Pro. The centre of your body lies slightly behind the centre of the ball cushion. Place your hands at the side of your head and slowly walk backwards with your upper body stretched out. Breathe out as you move backwards and breathe in again as you straighten up, paying attention to the tension in the centre of the body (abdomen). Repeat this exercise about 15 times.
Exercise 3

Lie sideways on the mat with your hips resting on the balance cushion. The lower arm supports the upper body, the upper arm rests on the hips. Raise your upper leg straight and lower it again slowly and in a controlled manner. The centre of the body remains stable, while the balance cushion ensures slight instability.
Exercise 4

Turn the Dynair Pro over with the plate facing upwards and get into a support position. Your body is stretched in a line. Activates the abdominal muscles. Shift your body weight from right to left. Each page 15 times. 3 passes.
→ You can find information about back-friendly balance cushions here www.agr-ev.de/en/balance-pads
Exercise 1

Sit upright on a stool or chair and place both feet on the vein trainer. Place your hands relaxed on your thighs. Now alternately press your heels and toes into the vein trainer to create a pumping up and down movement. Perform the movement slowly and rhythmically. This exercise stimulates blood circulation in the legs, relieves pressure on the veins and can prevent swelling and feelings of tiredness in the legs.
Exercise 2
Sit down in a relaxed position and place both feet on the vein trainer. Now slowly roll from your heels onto your toes and back again so that your foot and calf muscles are actively working. Make sure you perform the movement evenly and without applying too much pressure. This exercise promotes blood circulation, activates the venous pump and relaxes your foot and calf muscles in a pleasant way.
Exercise 3
Stand upright on the vein trainer and place your feet in a stable position. Keep your knees slightly bent and place your arms loosely in front of your body for balance. Now slowly shift your weight forwards and backwards or perform small rocking movements. Make sure you keep your balance evenly and control your movements. This exercise strengthens your foot and leg muscles, improves your balance and promotes stability throughout your body.
→ You can find information about back-friendly balance cushions here www.agr-ev.de/en/balance-pads
Exercise 1
Stand upright in front of the Aero-Step and bring your supporting leg into a stable position. Now place one foot on the device and shift your weight forwards in a controlled manner. Then get back on the floor and change legs. Perform the movement in a steady rhythm and keep your upper body upright.
Exercise 2

Stand with one foot centred on the Aero-Step and lift the other leg slightly off the ground. Find your balance by keeping your upper body still and using your arms loosely to stabilise yourself. Hold this position for a few seconds and feel how your foot, leg and core muscles work. Then change the leg.
Exercise 3

Stand hip-width apart on the Aero-Step and position both feet securely. Slowly bend your knees, push your buttocks slightly backwards and keep your upper body upright. You can move your arms forwards to stabilise yourself. Then push yourself back up to a standing position in a controlled manner.
Exercise 4

Stand upright in front of the Aero-Step and place one foot on the unstable surface in a controlled manner. Then bend both knees so that you go down into a lunge while the back foot remains on the floor. Make sure you keep your upper body upright and do not push your front knee beyond the tip of your foot. Push yourself up again in a controlled manner and then change sides.
→ You can find information about back-friendly balance cushions here www.agr-ev.de/en/balance-pads
Exercise 1

Lie on your stomach on the Balanza ball step so that your upper body is stable on the surface. Stretch your arms forwards and at the same time lift your legs and upper body slightly off the device. Hold the tension for a moment and then lower everything again in a controlled manner. Make sure you keep your neck long and continue to breathe evenly.
Exercise 2

Stand hip-width apart on the Balanza ball step and find a stable stance first. Shift your weight slightly backwards and bend your knees as if you were sitting down. Stretch your arms forwards to support your balance. Lower your pelvis in a controlled manner and then push yourself up again without falling into a hollow back.
Exercise 3

Sit in the centre of the Balanza ball step and support your hands slightly behind your body. Tilt your upper body back slightly without falling into a hollow back. Now raise both legs straight or slightly bent and hold the position in a controlled manner. Your stomach remains active and your back upright. Make sure you continue to breathe calmly and keep the tension even.
Exercise 4

Lie on your back on the Balanza ball step and make sure that your pelvis is stable on the board. Now raise both legs and bend them so that your hip and knee joints are at a right angle. Consciously activate your abdominal muscles and lift your upper body slightly until you feel a clear tension in the centre of your body. Move your arms forwards parallel to your thighs. Then lower your upper body again in a controlled manner without releasing the tension completely. Ensure that your breathing flows calmly and that the movements are performed evenly.
→ You can find information about back-friendly balance cushions here www.agr-ev.de/en/balance-pads
Exercise 1

Starting position: Prone position. Extend your arms forwards, open your legs and point your toes outwards.
Exercise: Raise and lower your upper body, arms and legs at the same time. repeat 16 times.
Exercise 2

Starting position: From a 4-legged stance, bend one leg forwards and place your hands on your buttocks. Exercise: Push your buttocks towards your front heel, pulling downwards at the same time.
Move your lower leg towards your bottom by grasping your ankle or ankle joint. Hold the position, then change sides.
Exercise 3

Inline Lunge Position einnehmen. Die Ferse schließt an das Knie in einer Linie an, die Hände sind seitlich gerade ausgestreckt und der Rumpf rotiert 90 Grad zur vorderen Beinseite.
Stabilisiert die Hüftachse. Dauer ca. 15-30 Sek., danach Beinwechsel
Exercise 4

Lie on your back and stretch your back with long arms.
Effects: Stretching of the chest muscles and mobilisation of the thoracic spine. hold for 15 - 30 seconds.
→ You can find information about back-friendly fascia rolls here www.agr-ev.de/en/fasciae
Exercise 1

Lie with your lower back on the fascia roll. Support yourself with your hands and bend your legs slightly. Roll out the side of the lower back by bending and stretching the legs. Remain on the pain points for about 15 seconds.
Exercise 2

Starting position: Lie on your back on the fascia roll and position your legs.
Execution: Clasp your hands behind your head, lift your buttocks and push yourself over the roller with your legs from your pelvis to the tips of your shoulder blades. Stay on the pain points for about 15 seconds.
Exercise 3

Lie with your upper back on the fascia roll and bend your legs slightly. Clasp your hands behind your head and slowly roll forwards and backwards along your upper back. Stay on the pain points for about 15 seconds.
Exercise 4

Starting position: Sit with your buttocks on the fascia roll and place your right foot on the knee of your left leg. Support yourself with your arms behind you.
Execution: Slowly roll forwards and backwards along the gluteal muscles. Stay on the pain points for about 15 seconds.
Exercise 5

Lie on your side on the floor and position the fascia roll under your hips. Support yourself on your forearm and keep your upper body stable. Now raise the leg on top, stretched out, and lower it again in a controlled manner. Make sure that your centre of the body remains active and that the movement is performed calmly.
→ Information about back-friendly gymnastics centres can be found here www.agr-ev.de/en/exercise-mats
Exercise 1

Exercise 2

Exercise 3

Exercise 4

→ Information about back-friendly gymnastics centres can be found here www.agr-ev.de/en/exercise-mats
Exercise 1

Exercise 2

Exercise 3

Exercise 4

Exercise 5
→ Information about back-friendly gymnastics centres can be found https://agr-ev.de/en/vibration-bar
→ Download exercise flyer "Vibration bar"
Exercise 1

Starting position: Stand shoulder-width apart, arms outwards at shoulder height, grip the swinging bar loosely with one hand parallel to the body. Movement execution: Swing outwards and inwards (change sides, approx. 30-60 seconds each time).
Exercise 2

Starting position: Stand with both hands loosely in front of the body at chest height, grasp the handle from above. Movement execution: Forwards - backwards (approx. 30-60 sec.).
Exercise 3

Starting position: Stand shoulder-width apart, grasp the swinging pole with folded (interlocked fingers) hands and bring it over your head with outstretched arms. Execution of movement: - Up - down (approx. 30-60 sec.).
Exercise 4

Starting position: Lunge, lift the back heel off the floor, arm on the side of the back leg loosely grasping the swinging bar, thumb pointing towards the thigh. Movement execution: Up - down, parallel to the thigh (change sides, approx. 30-60 seconds each time).
Exercise 5

Starting position: Lunge, lift your back heel off the floor, grasp the swinging bar so that the backs of your hands are pointing downwards, bend your elbows to approx. 90°. Movement execution: Start the movement loosely from the wrist forwards, forwards - backwards (approx. 30-60 seconds).
Exercise 6

Starting position: Stand with your feet shoulder-width apart, grasp the swinging pole with both hands vertically in front of your body. Movement execution: Swing the vibrating rod to the right and left (approx. 30-60 seconds).
Exercise 3

Starting position: Squat, grasp the swinging bar with both hands from above, stretch both arms forwards parallel to the floor at head height. Movement execution: Forwards - backwards (approx. 30-60 sec.).
→ Information about back-friendly training tubes can be found here https://agr-ev.de/en/training-and-therapy-pipes
→ Download exercise flyer "Training slashpipe"
Übung 1

Starting position: Squat, grasp the swinging bar with both hands from above, stretch both arms forwards at head height parallel to the floor. Execution of movement: Forwards - backwards (approx. 30-60 sec.).
Übung 2

Muscle group: The lunge is an exercise to strengthen the leg and buttock muscles. Starting position: Shoulder-width stance. Rear foot on the toes. Looking ahead.
Execution of movement: Downward movement of the back knee without touching the floor. Do not push your front knee over your foot. Keep your back upright. Page change. (approx. 10 repetitions per side)
Übung 3

Muscle group: The classic abdominal exercise. The crunch is an exercise to strengthen the straight abdominal muscles. Starting position: Supine position. Legs bent. SLASHPIPE with arms slightly bent in front of and above the body. Movement execution: The SLASHPIPE is pushed upwards by moving the upper body forwards. This tightens the abdominal muscles. (approx. 60 sec.).
Übung 4

Muscle group: The side bend is an exercise to strengthen the oblique abdominal and back muscles. Starting position: Spine straightened. Shoulder-width stance. Arms slightly bent. SLASHPIPE over the head. Movement execution: Tilt the SLASHPIPE to one side. Up to a lateral tilt that can be taken without pain. Page change. (approx. 10 repetitions per side)
Health guides are full of them: fitness enthusiasts, young families, and active retirees who, regardless of occupation, age, or life situation, defy all health complaints. They seem to effortlessly maintain an active lifestyle—an ideal image that, however, does not always reflect reality. Those who, due to an accident, a prolonged illness, or typical age-related complaints, suddenly have to limit their activities quickly realise: a healthy back is not a given. It needs movement and appropriate exercise. Only a strong back fulfils its stabilising function for the entire body.

But the truth is that falls become more frequent with age—often with more serious consequences than for younger people. Statistics show that about 30% of people over 65 who live at home fall at least once a year. In care facilities, this figure rises to 50%. Health issues such as poor eyesight, muscle weakness, or dizziness increase the risk, as do obstacles and tripping hazards in the home.
Nevertheless, this does not mean that older people should move less out of fear of injury. In fact, it is especially important in later life to strengthen muscles and train coordination. This not only improves physical fitness but also mental well-being. Movement and balance exercises are crucial for maintaining mobility and preventing back pain. Studies show that between 40% and 70% of people over 65 regularly experience back pain.

Those who feel unsteady when walking can use aids such as rollators or stair-climbing assistive devices. These are particularly helpful for balance problems, muscle weakness, or pain. Muscles and joints should not be spared but rather subjected to individually appropriate levels of stress. Walking aids enable people to cover longer distances, go for walks, run errands, and take breaks as needed. Climbing stairs is also excellent training for the whole body. With stair-climbing aids, seniors can safely and independently master this everyday challenge—and, unlike stairlifts—simultaneously strengthen their muscles. Stair-climbing aids must be easy to use and provide the necessary safety.
KNOWLEDGE
Keep going, don’t give up—think of your back!
Handrails and grab bars can be installed in various areas of the home to assist with standing up and walking. The right mattress and an adjustable bed are essential for restful sleep and physical recovery, even in the presence of pain or limited mobility.

“If you’re ill, you should stay in bed.” True, or not? While this may seem logical at first glance, it is only conditionally advisable for patients with chronic pain. Those suffering from conditions such as arthritis, rheumatism, or osteoporosis—the most common ailments in old age in Germany—or experiencing a painful acute slipped disc naturally tend to avoid movement. This is understandable, as even a short walk or a trip to the supermarket can become a challenge with such handicaps. Affected individuals avoid any unnecessary additional activity simply because it is associated with pain. However, excessive rest can lead to a downward spiral of pain, inactivity, and declining physical capacity.

This makes it all the more important for patients to remain mobile and train their overall strength and flexibility—in a way that is appropriate and gentle on the back. There are various aids available for this purpose, from rollator to medical back therapy devices, fascia rollers, and heat wraps. All of these can help maintain or restore patients’ independence in the long term, especially after an accident. The key to success is finding the right balance of movement and exercise: for example, overdoing it after a slipped disc and putting incorrect strain on the back can hinder recovery. However, those who listen more closely to their bodies often find that they are capable of much more than they initially expected.
Backpacks are much more than practical everyday companions – they play a crucial role in our back health. Especially at a young age, when the back is still growing, choosing the right backpack can have long-term effects on posture and well-being. An ergonomically adapted fit and proper carrying comfort can prevent postural damage and positively support growth.
However, requirements vary depending on age, everyday life and area of use: from school bags to nursery and preschool backpacks to student backpacks and cycling backpacks, there are special models that are optimally tailored to the respective stage of life or purpose. In the following sections, we present tested and recommended variants for these target groups.
1
2
3
4
5
Sie nehmen Kontakt mit uns auf und erhalten erste Informationen zum AGR-Gütesiegel und zum Prüfprozess.
Telefon: +49 471 962636-0
E-Mail an Detlef Detjen oder Dirk Hinck
Online Formular

Sie stellen das Unternehmen und Ihr rückenfreundliches Produkt vor und erhalten alle wichtigen Infos zur Aktion Gesunder Rücken und dem AGR-Gütesiegel. Welche Leistungen sind für Sie wichtig? Wie können Sie das AGR-Gütesiegel optimal einsetzen? In einem unverbindlichen Gespräch tauschen wir uns gemeinsam aus.
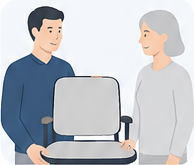
Durch ein Mitglied des Prüfungsgremiums wird das Produkt vor Ort begutachtet. Ist der Gesundheitsnutzen überzeugend, dass das Produkt zur Förderung der Rückengesundheit beitragen kann, folgt die Gütesiegelprüfung.
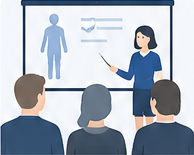
Der Hersteller muss vor dem gesamten Prüfungsgremium den rückenfreundlichen Nutzen des Produktes nachweisen, indem die Wirkungsweise präsentiert wird – z. B. in Form von Studien bzw. Beweisen. Wichtig: Jedes Produkt muss vor Ort sein und wird von den Prüfern ganz genau begutachtet.
Sie haben es geschafft! Ihr Produkt hat das AGR-Gütesiegel erhalten. Nutzen Sie das AGR-Gütesiegel z. B. in Verkaufsunterlagen, auf der Website, auf Social Media Kanälen oder direkt am Produkt und machen Sie sich sichtbar: Dieses Produkt kann helfen, Rückenschmerzen zu vermeiden!

Online-Kontaktformular ausfüllen und Ihr Vorhaben kurz beschreiben

Wir besprechen Ihr Ziel – Gesundheitstag, Vortrag oder Arbeitsplatzberatung
Wir suchen geeignete Experten und stellen den Kontakt her

Sie wählen Ihren Favoriten und planen alles Weitere direkt mit dem Experten
Freuen Sie sich auf unseren monatlichen Rücken-Newsletter mit frischen Impulsen für Ihre Rückengesundheit, spannenden Veranstaltungen und attraktiven Gewinnspielen – einfach anmelden und informiert bleiben!
| Zum Newsletter anmelden! |


